
 Follow @mickyroudy
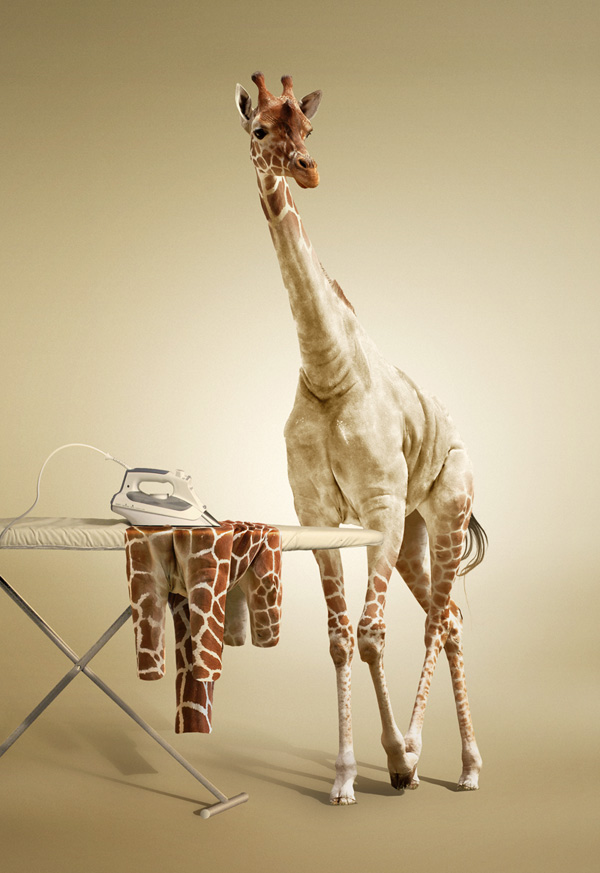
 Have you ever wanted to know what a Giraffe looks like without its spots? If so, this tutorial is for you, you pervert! Today, we will demonstrate how to undress a giraffe by removing its spots. We will then show how to turn its spots into an outfit that will be draped over an ironing board. Pretty cool! Let’s get started!
Final Product What You'll Be Creating
Have you ever wanted to know what a Giraffe looks like without its spots? If so, this tutorial is for you, you pervert! Today, we will demonstrate how to undress a giraffe by removing its spots. We will then show how to turn its spots into an outfit that will be draped over an ironing board. Pretty cool! Let’s get started!
Tutorial Assets
The following assets were used during the production of this tutorial.
Step 1
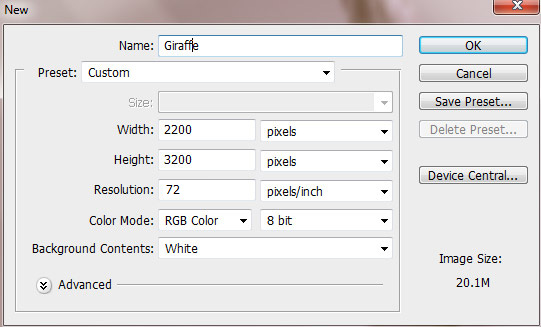
Let’s start by creating a new document in Adobe Photoshop. The size of document is 2200×3200 pixels at 72 px/inch of resolution. Start by filling the background with any color (white for example).
Step 2
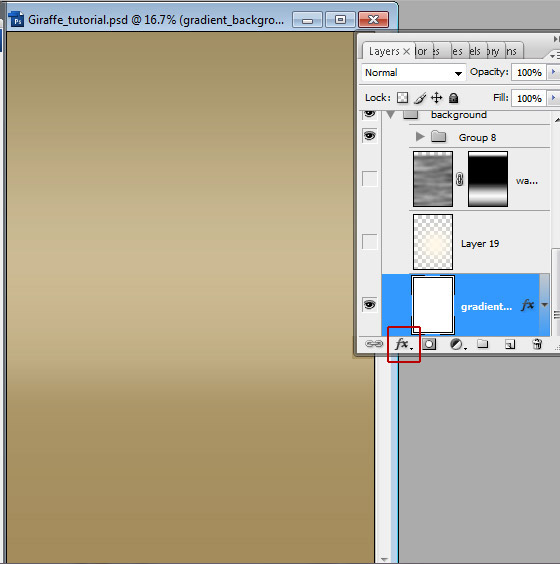
First of all let’s create a simple and plain background. You may crate your own more interesting and multi-layered background – old style wallpapers or may be savanna landscape.
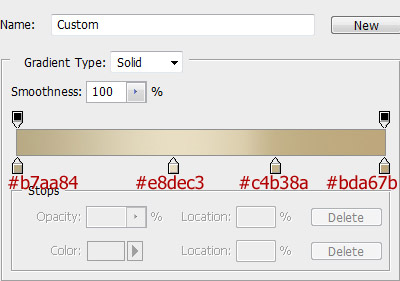
We will use gradients and filters. Unlock the "Background" – right click on background thumbnail and choose "Layer from background", click "Add a layer style" small icon in the bottom part of the Layers Palette. Apply "Color Overlay" and "Gradient Overlay" styles. Use setting and colors just like on the screen shots below.


Step 3
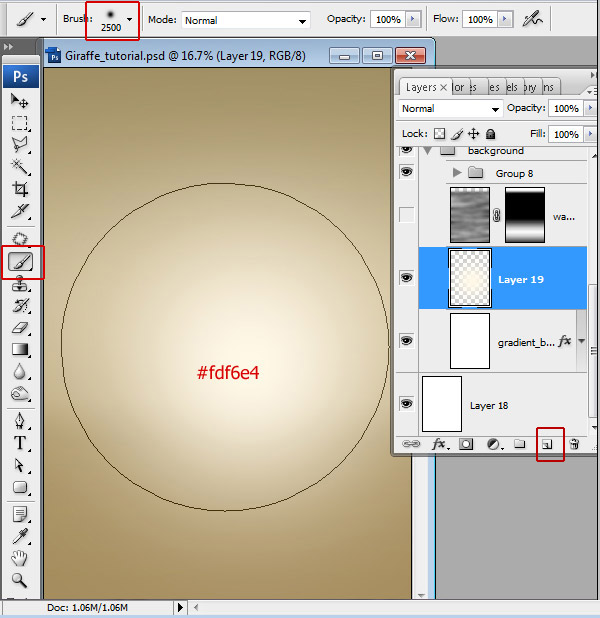
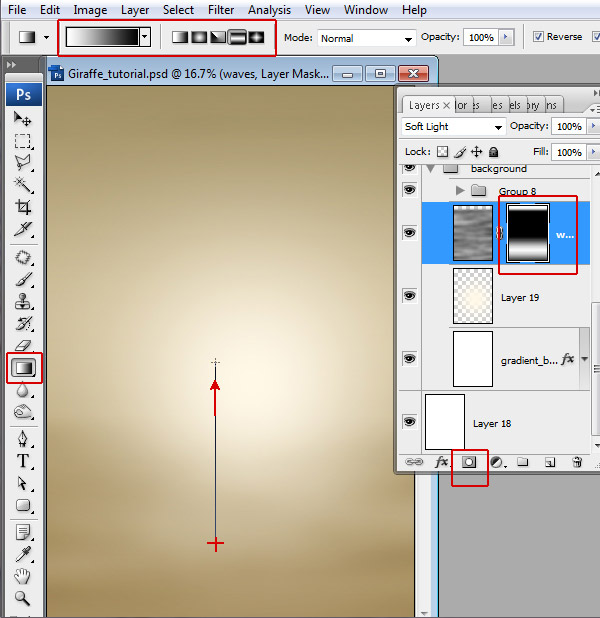
Create a new empty layer above background layer – click "Create a new layer" icon  . Choose huge soft, light color Brush Tool and draw a spot in the central part of the document.
Step 4
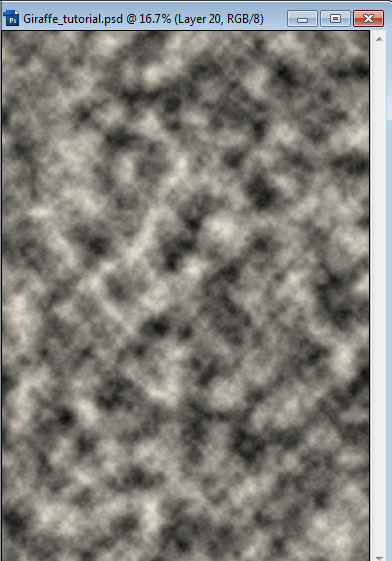
Create a new layer above light spot layer. Go to Menu > Filter > Render > Clouds.
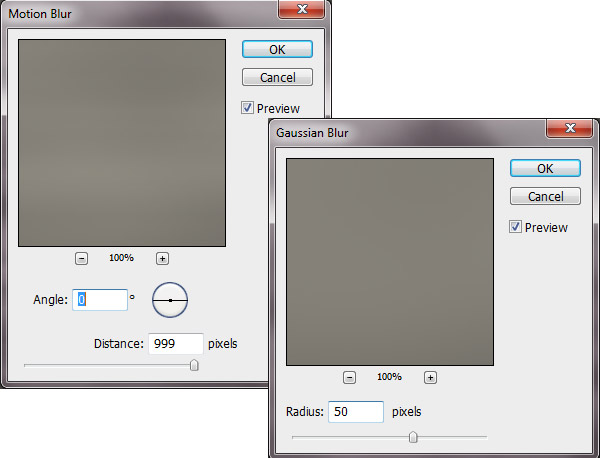
Choose Filters menu again and find Blur filter, apply Motion Blur and Gaussian Blur filters to clouds layer one by one. Add Layer Mask to blurred layer, click "Add Layer Mask" icon . Make Layer Mask active and fill it with black and white Reflected Gradient in the bottom part of the document.
Step 5
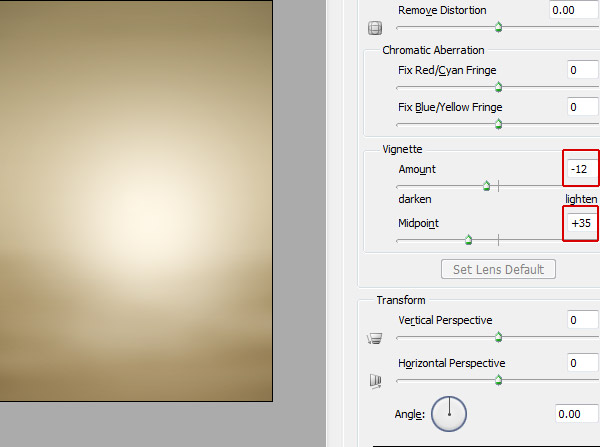
In order to create Vignette effect, choose Menu > Filter > Distort > Lens Correction > play with Vignette Amount & Midpoint settings.
Step 6
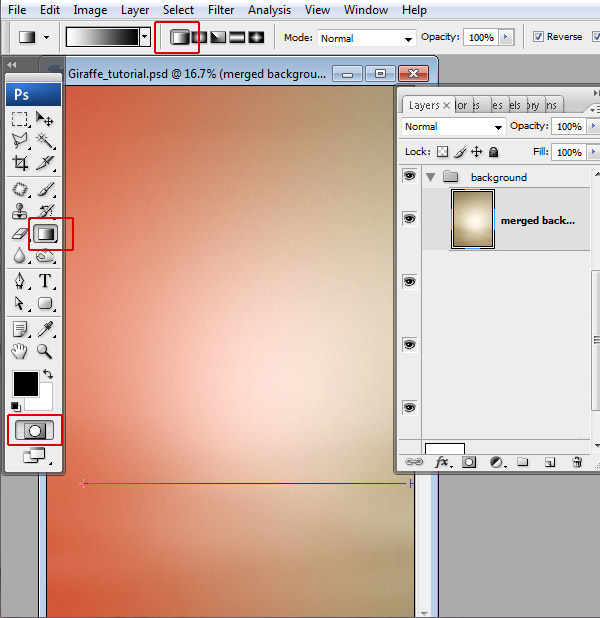
Merge all created layers. Make lighter the right part of our background, the light source will be directed from right. Make active Quick Mask Mode  , choose Linear "black and white" Gradient Tool. Fill layer with gradient from left to right edge of the document. The left side should become pink. Make Quick Mask inactive (click icon).
Step 7
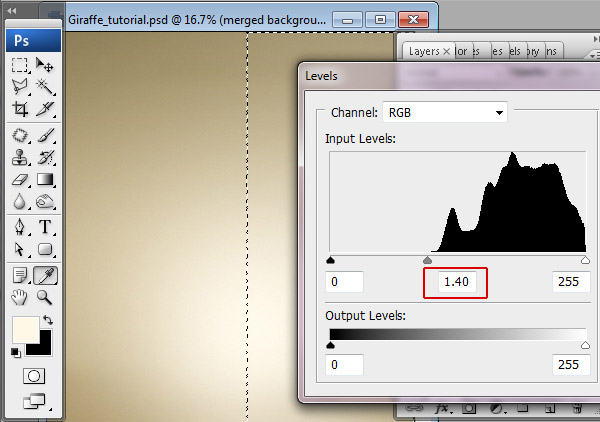
You will have selected area like on the screen shot. Play with Levels settings. Menu > Image > Adjustments Levels, move gray marker left. You can add small noise effect, to the created background layer. Go to Menu > Filter > Noise > Add Noise > 4; Uniform.
Step 8
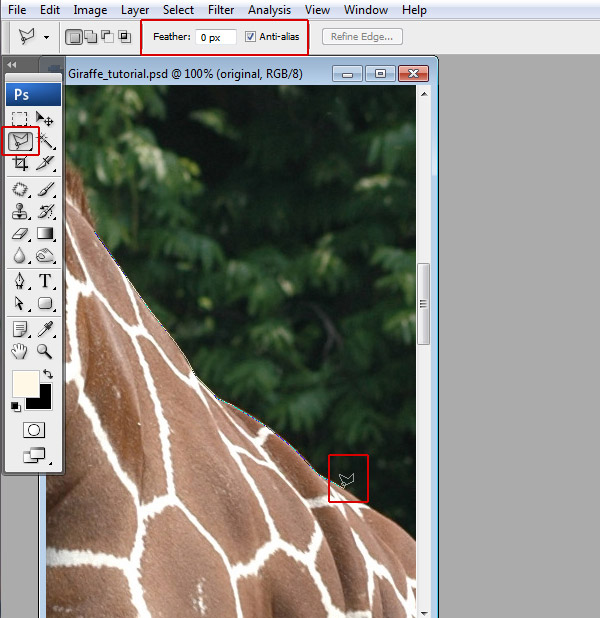
Insert giraffe image. Menu > File > Place – choose giraffe .jpg file. In order to separate giraffe silhouette from background, choose Polygonal Lasso Tool. You may use other methods, but this one is pretty easy and convenient. Click in the giraffe silhouette area to set the starting point. Continue clicking to set endpoints for subsequent segments. To close the selection border click over the starting point.
Step 9
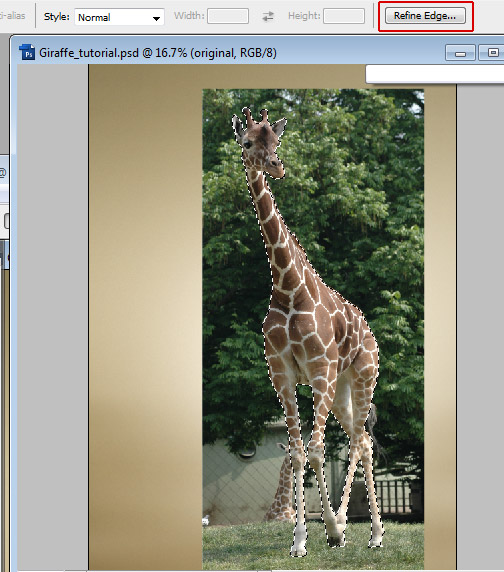
Click Refine Edge to improve the quality of a selection’s edges.
Step 10
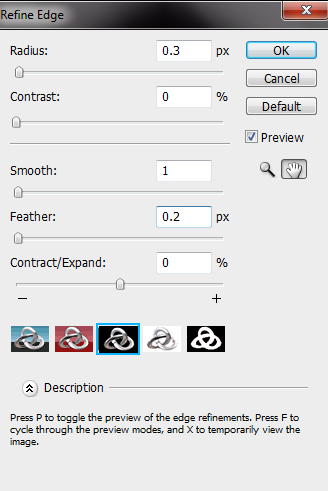
Use following Refine Edge settings. Click "Ok" and inverse selection: Menu > Select > Inverse. Erase or clear selected background area (Menu > Edit > Clear).
Step 11
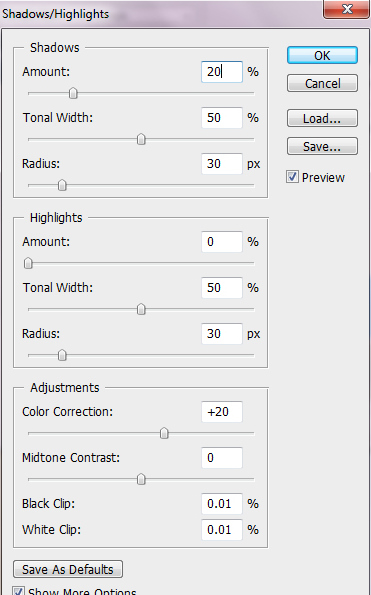
In order to retouch and improve color balance of the Giraffe image choose Shadows /Highlights from Image > Adjustments menu. Apply following settings:
Step 12
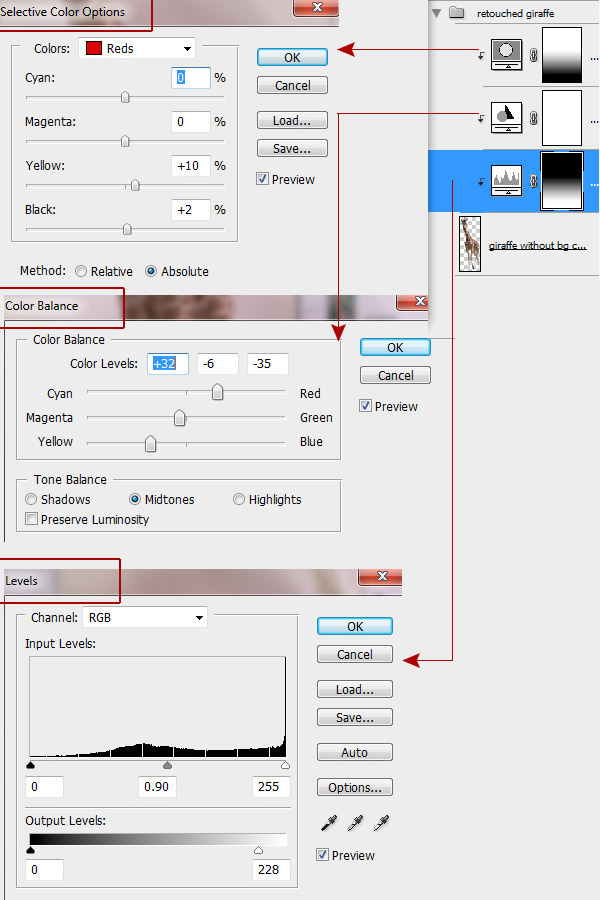
Add the new adjustments layers above Giraffe layer- "Levels", "Color Balance", "Selective Color Options", click  icon in the bottom menu of the Layers Palette. Select all adjustments layers (make them active), right click > choose "Create Clipping Mask". Apply setting for each adjustment layer like on the examples below. Fill "Selective Color" and "Levels" Layers Masks with linear "black and white" gradient.
Step 13
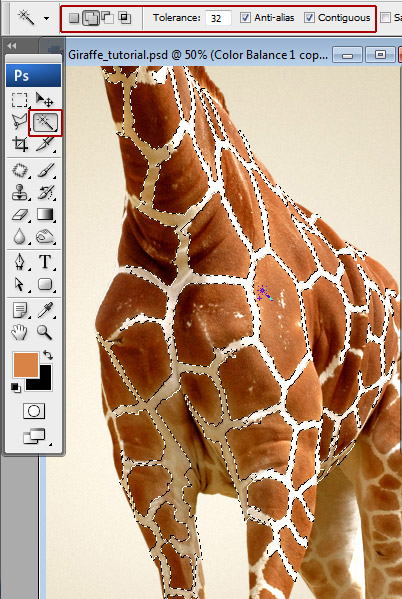
Load selection for white stripes with Magic Wand Tool. It is not necessary to load selection for all white spots at once, you may do this work by portions. Go to Menu > Select > Modify > Expand (expand by 1px).
Step 14
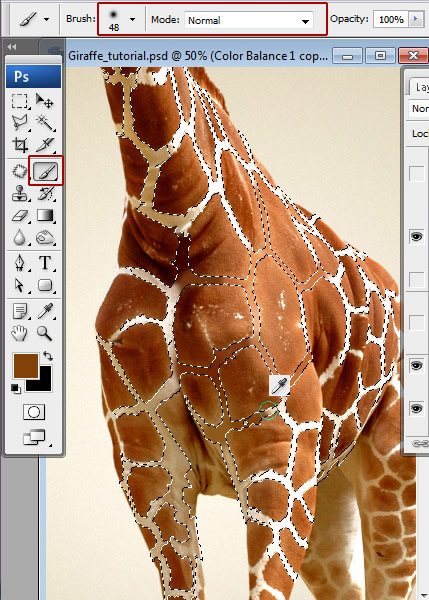
Duplicate the retouched Giraffe layer and fill selected stripes with brown color in the duplicated layer, name it "Clean skin layer". The original retouched Giraffe layer will be needed in the future steps, be sure that the original layer is below duplicate). Use 0% hardness brush and hold down the "Alt" key to activate Eyedropper Tool and find right color next to each stripe.
Step 15
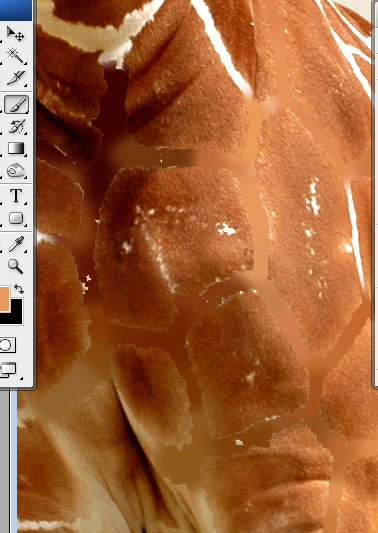
You should have something like this and you may fill out white areas with color step by step. Brown color stripes will be helpful to create more accurate result.
 Follow @mickyroudy


